TweakUI
TweakUI is a powerful utility that you can use in Windows 95, 98, or NT to
tweak the user interface.
You can use this utility for a variety of tasks, such as enabling or disabling
the CD-ROM auto-run feature, log onto a network automatically, and more.
TweakUI was originally written for Windows 95, but was not actually included
on the Windows 95 CD (you had to download it).
TweakUI was included on early Windows 98 CDs, but it is not included with
Windows 98 SE CDs.
For whatever reason, the utility is not installed during the Windows 98 installation.
This tip shows you how to install it, and how to use some of its features.
In any case, TweakUI can be downloaded from a variety of download sites for 95, 98 or NT.
As a matter of fact, you can click here to download
a self-extracting compressed set of TweakUI files.
Step by Step
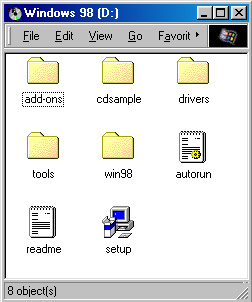
- TweakUI is included on the Windows 98 CD.
The figure to the right shows a directory listing of that CD.
TweakUI is stored in \tools\reskit\powertoy.
Double-click on the tools icon, then double-click on the reskit
icon, and finally double-click on the powertoy icon.
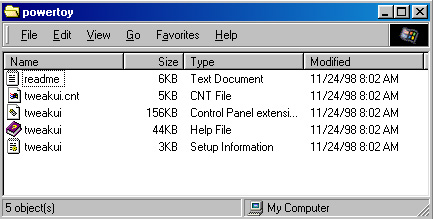
- The figure to the right shows the contents of the \tools\reskit\powertoy subdirectory.
(Note: When you display a directory, or folder, you have several options for
the setup of the display.
The figure to the right shows Details; other options are Large icons,
Small icons, and List.
To change the format of your display, select the desired option from the View
menu option at the top of the window.
Details, as the name suggests, provides the most information about the listed files.)
- Right-click on the file which is listed as Type Setup Information.
A pop-up menu will list several options.
Select Install.
Installation of TweakUi will begin immediately.
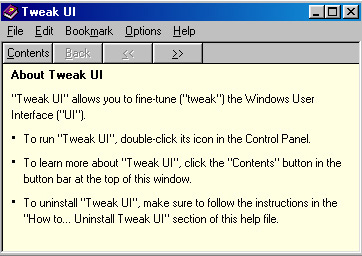
- The second step of the installation will display some introductory information about TweakUI
(shown in the figure to the right).
You will need to close this window (File, Exit) to continue installation.
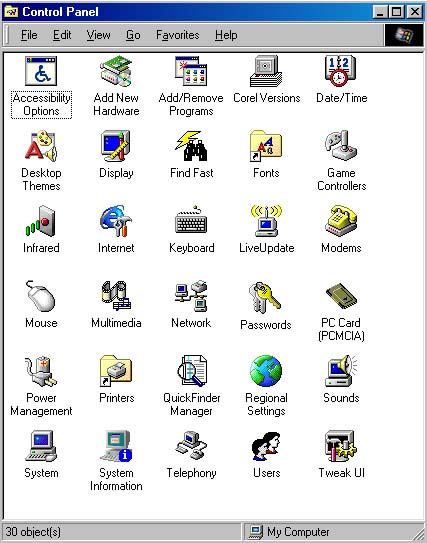
- Installation of TweakUI will add a TweakUI icon to your Control Panel window
(shown in the bottom right corner of the figure to the right).
To access TweakUI, open Control Panel (double-click on My Computer on your
main desktop, then double-click on Control Panel) and double-click on the TweakUI icon.
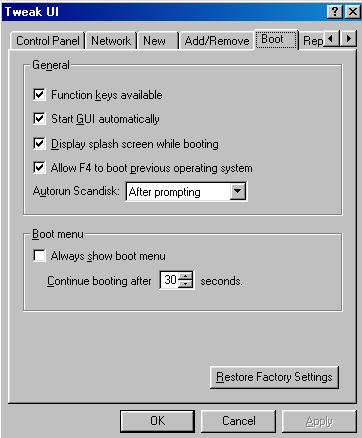
- The figure to the right shows the Boot tab window for TweakUI.
As you can see, there are several items that you can easily enable or disable
to customize your system.
For example, by default, Scandisk is run automatically when you boot your computer
after an abnormal shutdown.
TweakUI gives your three choices for this action: Never, After prompting, and Without prompting.
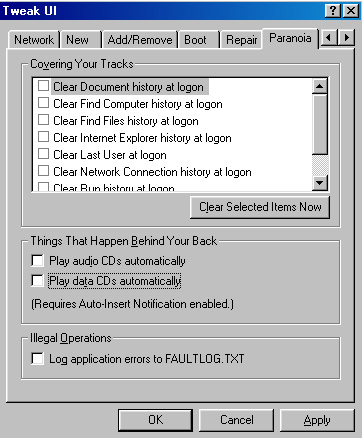
- The figure to the right shows the Paranoia tab window.
This window contains (among other items) two checkboxes that you can use to
enable or disable the automatic playing of CDs (Play audio CDs automatically
and Play data CDs automatically).
The Paranoia window lists several options which might be particularly beneficial to paranoid users.
The frame labelled "Covering Your Tracks" lets you turn on features which will
automatically delete or clear files during the boot process.
Note, however, that covering your tracks can slow down the boot process, so
you might want to give careful consideration as to whether these features should
be enabled or disabled.
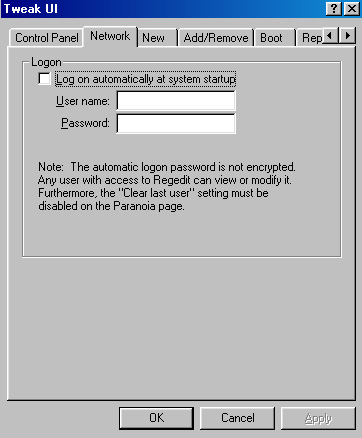
- You can use TweakUI to have your computer automatically log onto a network during the boot process.
The figure to the right shows the Network tab.
Click the checkbox to Log on automatically at system startup,
and enter your login User name and Password in the appropriate text fields.
Please let us know if this tip has been helpful.
Email to rpearson@cobilan.msstate.edu.
Date posted: 11/15/99